Set up enrollment
![]() A provision for determining benefits when a member has more than one benefit plan.) questions, Medicare questions, custom questions, coverage bundles
A provision for determining benefits when a member has more than one benefit plan.) questions, Medicare questions, custom questions, coverage bundles![]() A benefits package that members can choose to elect during enrollment., and editable member and dependent demographics. You need to have the Online Enrollment MemberXG add-on to access this feature.
A benefits package that members can choose to elect during enrollment., and editable member and dependent demographics. You need to have the Online Enrollment MemberXG add-on to access this feature.
See Enrollment overview for more online enrollment information.
Configure the enrollment welcome page
Set up the page members see when they first open the enrollment tab on the member portal. Add text and a logo, then configure which enrollment time frames members can select and make elections for.
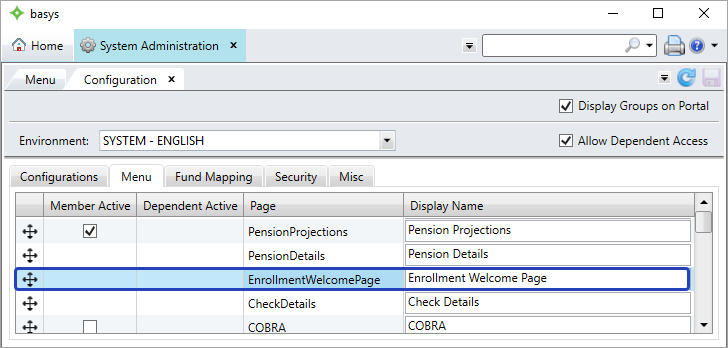
Go to: Home > System Administration > MemberXG > Configuration
-
Open the Menu tab, then double-click
EnrollmentWelcomePage.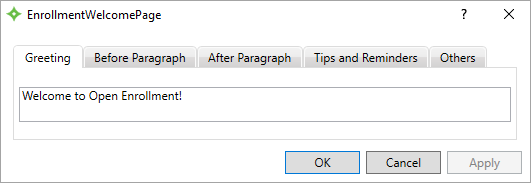
- Open the
Greetingtab and enter the enrollment page greeting. - Enter the enrollment welcome page's before and after paragraphs. See Before and after paragraphs.
-
Open the
Tips and Reminderstab and enter any tips and reminders for your members.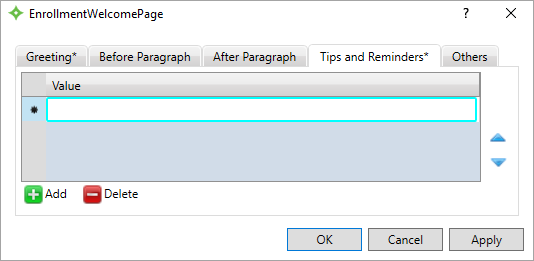
- Click
 .
. - Enter the tip or reminder in the row.
- If you need to re-order the row with other rows, click it and use the blue arrows to move it.
- Repeat as needed.
- Click
- Open the
Otherstab. - To add a logo to the welcome page, click
Browseand select the image from your directory. -
Choose how many enrollment periods are available for members to enroll in. For example, enter
1to only display the most recent enrollment period, or enter3to display the most recent enrollment period and the two prior enrollment periods. Each enrollment is given its own link. Be sure to fill in this sectionImportant! Be sure to enter a value for this field, or members won't be able to enroll. - Click
Applyto save the information. - Click
OKto close.
Create an enrollment time frame
Set the enrollment time frame dates and the time frame's election period.
You can also import an enrollment time frame's dates and details from a spreadsheet. See Import enrollment configuration.
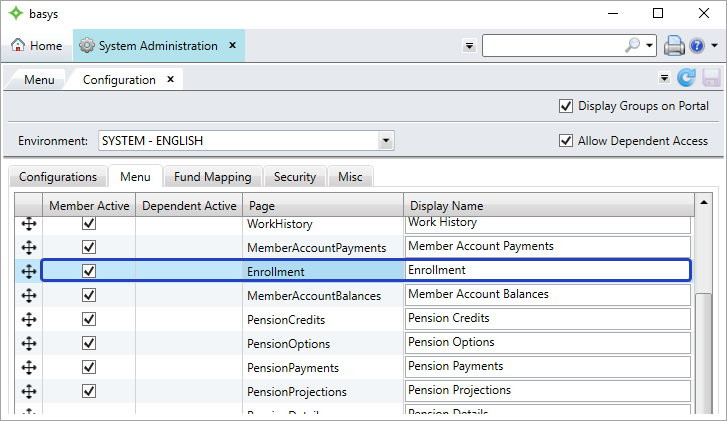
-
Double-click
Enrollment.
-
Click
 .
.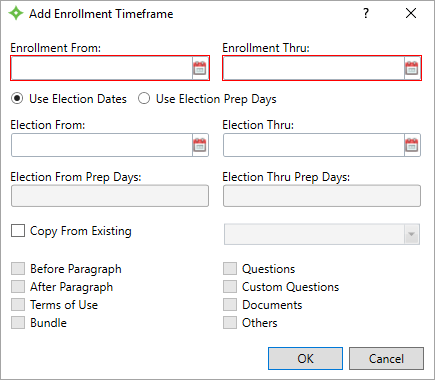
- Enter the enrollment time frame information.
Add the enrollment terms of use
Configure the terms of use members have to read and agree to before starting enrollment.
-
Open the
Terms of Usetab. The default terms of use text displays.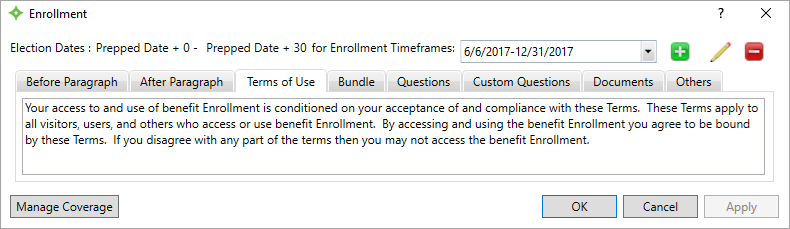
- Change the terms of use text as desired.
- Click
Applyto save your changes.
Add enrollment documents
Add enrollment-related documents to the member document center. Any member who is prepped under the enrollment time frame will be able to see the documents.
-
Open the
Documentstab.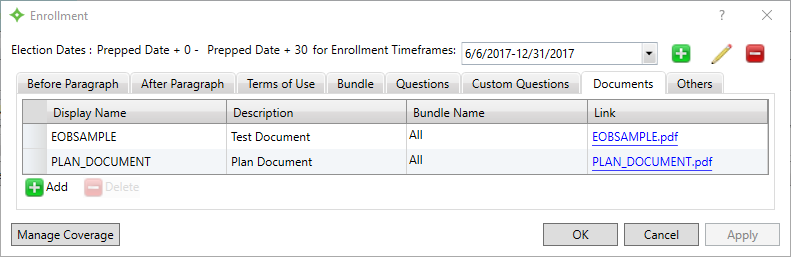
- Click
 .
. - Select the document to select from your directory, then click
Open. The new document displays in theDocumentstable. -
If necessary, click and edit the document fields:
Display Name—The document name members will see on the portal. Be sure to make the display name something members will recognize.Description—The document description. Members won't see this description.Bundle Name—Select the bundle A benefits package that members can choose to elect during enrollment. to associate the document to, or select
 Allto make it available to all bundles A benefits package that members can choose to elect during enrollment..
- Repeat steps 17-19 for each document.
- Click
Applyto save your changes.
Enter the Coordination of Benefits (COB), Medicare, and custom questions
COB questions
Determine what COB![]() A provision for determining benefits when a member has more than one benefit plan. information members will have to enter for themselves and their dependents during enrollment. You can view what they enter on the Manage Enrollment screen once they enroll. See Manage online enrollment.
A provision for determining benefits when a member has more than one benefit plan. information members will have to enter for themselves and their dependents during enrollment. You can view what they enter on the Manage Enrollment screen once they enroll. See Manage online enrollment.
-
Open the
Questionstab.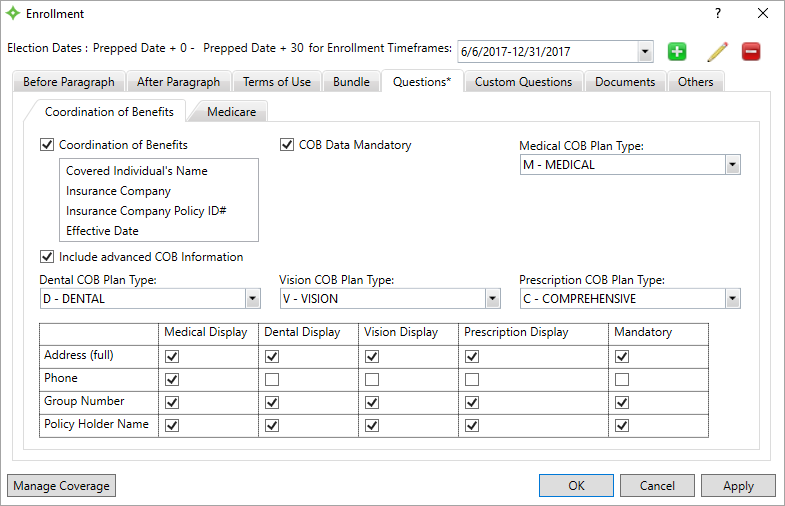
- Enter the COB A provision for determining benefits when a member has more than one benefit plan. question information.
- Click
Applyto save.
Medicare questions
Determine what Medicare information members will have to enter for themselves and their dependents during enrollment. You can view what they enter on the Manage Enrollment screen once they enroll. See Manage online enrollment.
-
Click the
Medicaretab.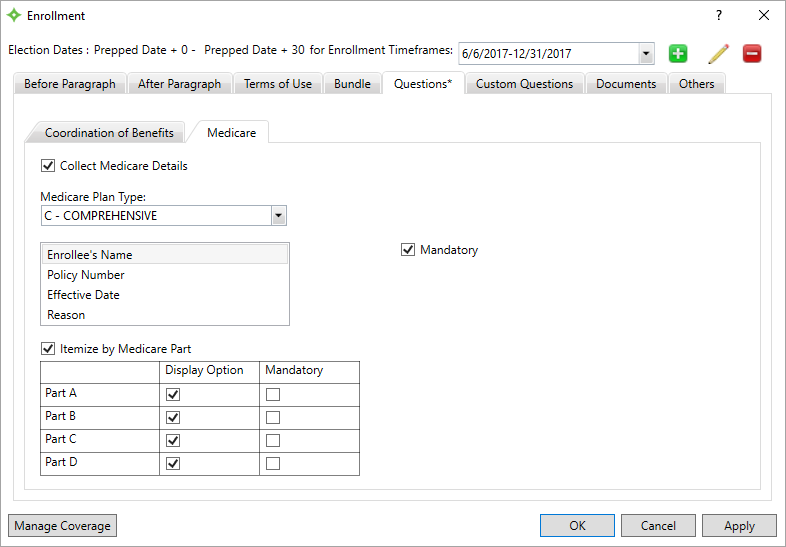
- Enter the Medicare question information.
- Click
Applyto save.
Custom questions
Enter custom questions that members will answer while electing for the enrollment time frame. These questions are meant to gather basic information about your members. You can view their answers on the Manage Enrollment screen once they enroll. See Manage online enrollment.
-
Click the
Custom Questionstab.
- If you want add questions before bundle election, select the
Leading Pagestab. If you want to add questions after bundle election, select theTrailing Pages. - Click
Applyto save the question(s).
Configure the coverage types
Set up all the coverage types you want to include in each of your bundles![]() A benefits package that members can choose to elect during enrollment.. The coverage types you set up will be available for all the group's bundle and enrollment time frames.
A benefits package that members can choose to elect during enrollment.. The coverage types you set up will be available for all the group's bundle and enrollment time frames.
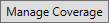 to configure coverage names, codes, and
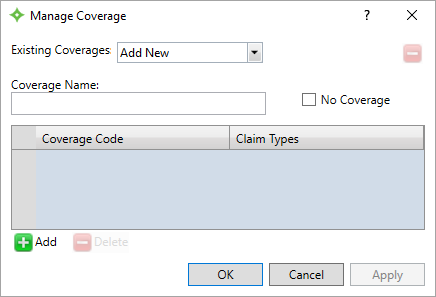
Set up enrollment bundles
The enrollment bundles![]() A benefits package that members can choose to elect during enrollment. determine the coverage benefits members can elect for an enrollment time frame. A bundle
A benefits package that members can choose to elect during enrollment. determine the coverage benefits members can elect for an enrollment time frame. A bundle![]() A benefits package that members can choose to elect during enrollment. is a coverage benefit or group of benefits that members can choose when electing coverage for the enrollment time frame. A member will elect one bundle, and one bundle per dependent. Set up a bundle
A benefits package that members can choose to elect during enrollment. is a coverage benefit or group of benefits that members can choose when electing coverage for the enrollment time frame. A member will elect one bundle, and one bundle per dependent. Set up a bundle![]() A benefits package that members can choose to elect during enrollment. for each benefits package you want members to choose from.
A benefits package that members can choose to elect during enrollment. for each benefits package you want members to choose from.
-
Open the
Bundletab.
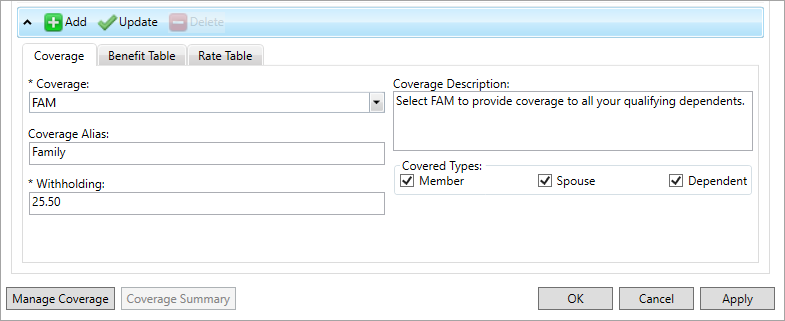
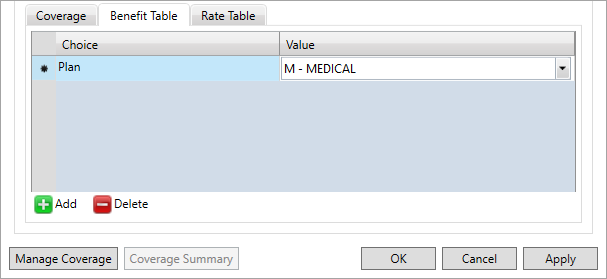
- Click to create a new bundle A benefits package that members can choose to elect during enrollment..
- Enter the new bundle A benefits package that members can choose to elect during enrollment. information.
-
Click
 to view and verify that you've set up the bundle A benefits package that members can choose to elect during enrollment. coverage correctly.
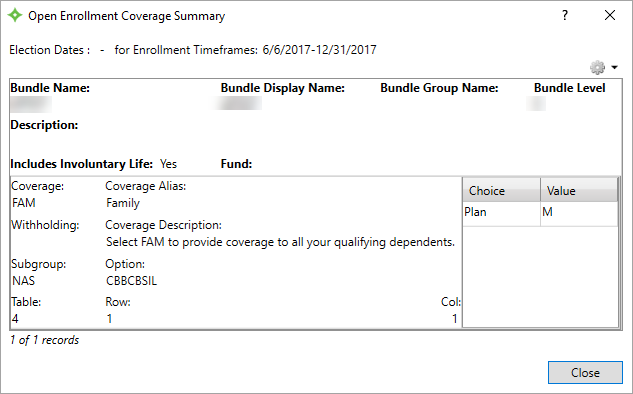
Configure editable member demographics
Configure the demographics members can edit during enrollment. This includes their personal information and their dependents' information. You can view their changes on the Manage Enrollment screen once they submit their election. See Manage online enrollment.
-
Open the
Othertab.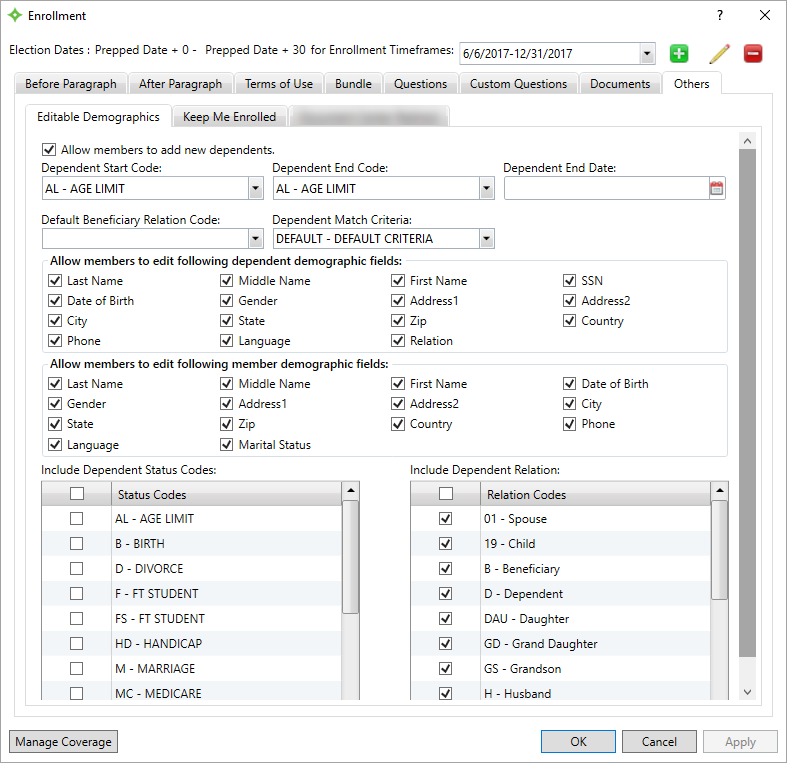
- Enter the editable demographics information.
- Click
Applyto save.
Enable enroll and waive preferences
Determine whether members can choose to remain enrolled or waived from their previous enrollment.
-
Open the
Keep Me Enrolledsubtab under theOtherstab.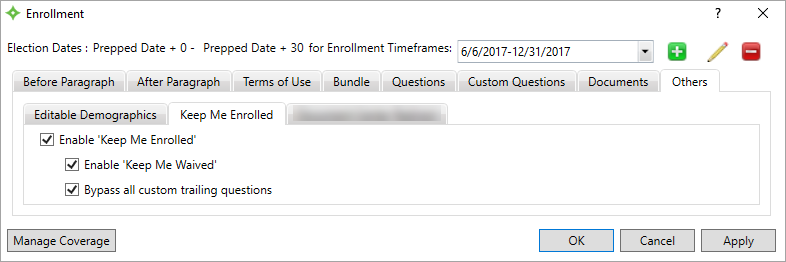
- Select or ignore the options
- Click
Applyto save. - Add header and footer text to the member enrollment pages. See Before and after paragraphs.
- Add members to the enrollment time frame. See Import members for enrollment.
Once members have been added to the enrollment time frame and the election period is active, track and manage the associated members. See Manage online enrollment.
- To save time during future enrollment time frame setups, export the enrollment time frame you just created and use it as model for future time frames. See Export enrollment data.
- See Manage MemberXG admin accounts to set up open enrollment agents. Open enrollment agents have limited access to the member's portal account and information, allowing them to help members enroll.
- See Adjust enrollment period dates to change an enrollment periods or an election period's from and thru dates.